
A huge screen, great audio quality, and comfy seats are three of a movie theater’s biggest draws. But to have an amazing film viewing experience today, you don’t have to buy an expensive movie ticket and overpriced popcorn, beverages, and other snacks.
With a top-notch wall mount TV and the right AV system and correct installation, you can enjoy a superb viewing experience regardless of whether you’re watching a movie, TV program, concert, or live sports event. Best of all, you get the same quality over and over again and without paying for any high-priced treats.
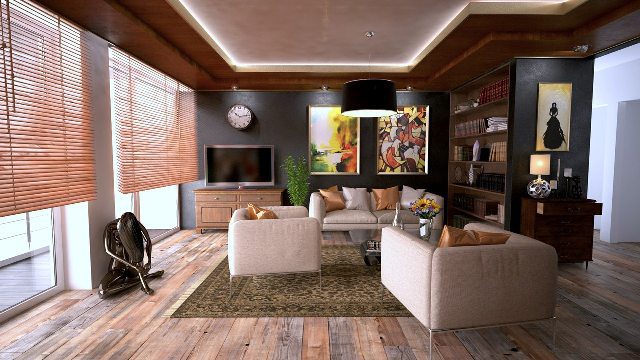
Home Theater System Installation
Installing an AV system at home is something that you can learn to do yourself. However, you need to know when to get help from the experts. If your AV system is not installed properly based on manufacturer instructions and standards, you will encounter a lot of issues. It can cause accidents and major damage to your home as well.
When setting up your home theater system, here are 10 important tips you have to remember:
-
Make sure you have all the components needed to assemble a home theater system
Basically, a home theater system is made up of a TV set, media player (DVD or Blue-Ray), speakers, and a receiver or control unit. If you don’t have this system yet, you can purchase a home theater or AV bundle (also called home theater in a box or HTiBs) from Graham slee hifi. These bundles can give you greater value compared to buying each piece separately. This option usually takes much of the guesswork out of buying an AV system. Everything you need is just in one package and it is easy to set up. In addition, the speakers are all pre-matched so you are sure you will get great audio quality.
In case you already have a surround-sound system, you can consider upgrading or adding to your speakers. By carefully selecting your new speakers, you can have a customized home audio solution that can satisfy your listening requirements.
Also Read:- Tips to Resolve Microsoft SQL Server Error 3456
-
Find the perfect spot for your main AV room and additional viewing areas
Determine where you want your AV room or zones, and the head-end or receiver, to be positioned. Do you want your living room to house your home theater system? Do you also want other rooms and equipment connected to the AV system?
Next, consider where to place the main equipment or receiver. The AV receiver is the main controller for your system and contains all the amplifiers that drive your speakers. This equipment often gets hot easily, so do not lock it away in an airtight cabinet. In addition, make sure you can get to the back of the receiver to connect the wires and place it in an area where you can point the remote control at it.
It is best to select a head-end location with climate control to prevent your equipment from overheating. Having a fan or cooling system in the head-end area will also help you avoid any overheating issues.
-
Make sure your TV is suitable for your new AV system
If you already have an HDTV, your device will work well with your new system. However, if you still have an old TV, you may have to get a newer model.
When shopping for your new television set, keep in mind that bigger doesn’t always mean better. The latest TVs are quite thin and light and are thus easy to move around if you have to. They come with several smart and innovative features as well such as built-in Internet streaming, Wi-Fi connectivity to your other devices, alerts for your favorite programs or big sports events, and more.
Also Read:- Learn How to Repair Damaged CorelDRAW CDR File with Ease
-
Find the perfect spot for your TV
Generally, your TV should be close enough to give you the feeling that you’re in the thick of the action (the same feeling you have whenever you’re in a real movie theater). However, it should not be so close to you that you feel overwhelmed or can see the individual pixels on the screen. If you have an HDTV screen, the recommended minimum distance between you and the TV should be about one and half times the diagonal size of the screen.
-
Read the manual
Once you unbox everything, go over the instruction manual. Read all the steps, manufacturer’s recommendations, and any tips they may have been provided. The last thing you want to do during the time-consuming and lengthy process of setting up your home theater system is to start over from scratch when you’re nearly done just because you did not connect the right wire or cable.
Before starting the installation process, pore over the details and make sure you understand each step and have all the necessary parts and tools you will need.
-
Place your speakers in the right areas
Ideally, all speakers should be the same distance away from the listener. However, this can pose certain problems, especially if the room has a lot of furniture and decor. If this is not possible, make sure that the front left and right speakers are roughly the same distance from where you’ll be sitting. Try to place them at about head height and about eight feet away from your usual sitting position.
For specific types of speakers, take note of the following:
- Center speaker – This should be placed in an area where it is pointing directly at the spot where you will usually sit, preferably at head level. Do not put it under the screen or above it since this will make voices and sounds seem like they’re coming from the sky or under the ground.
- Rear speakers – These speakers can be placed closer to or farther from your typical sitting area. However, try to put them just above and behind your head as you are seated. Try to keep the distances as equal as possible as well. Make sure you angle them slightly towards the front of the room but do not point them directly at your viewing spot.
- Subwoofers – Subwoofers are often best placed near the front speakers. Make sure you do not place these speakers in a corner since they can make low-frequency audio sound muddy and overstated. Keep them a few inches from the wall as well. Aside from being great speakers, subwoofers can also be used as plant and magazine stands.
-
Properly connect and arrange your cables and wires
After setting up the speakers, connecting and organizing the cables and wires is often the second most difficult part of the whole installation process. This is because you have a lot of cables and wires to connect and fix; when these are done improperly, they won’t do anything good for your interior. They can be tripping hazards as well.
The best option is to run wires and cables under the floor or hide them under the carpet. If this is not possible, use clips to fasten the cables and wires to the floor or along the skirting boards at the bottom of the wall.
When connecting the wires and cables, make sure you follow the system’s color coding scheme. Home AV systems typically come with color-coded wires for each speaker and you should follow the manufacturer’s installation instructions.
To avoid having problems with your cables and wires (especially if they all look alike), label each one of them on both ends. By correctly cable labeling, you will never have to trace a cable again or ask someone to hold one end while you tug on the other. This trick will save you a lot of time and work. Also, if you ever need to replace a cable with a longer one, you will know exactly which one it is quickly.
Also Read:- Don’t Empty Your Wallet and Smartphone Battery with These Tips
-
Configure your AV receiver
Most new AV systems have an automatic set-up system where you simply place a supplied microphone in your listening position and press a button to command the system to sort itself out. However, not all systems have this automated feature, and if yours don’t have it, you will have to understand the instructions and do some manual work (or pressing of buttons).
In general, it is always best to select the recommended settings, to begin with. Only make the adjustments if you’re sure you can’t fix the problem by just moving the device itself. Sometimes, moving it just a few inches will make a big difference.
If your system has an automated set-up, it will show you what it will do with your room. It will consider distances for each speaker from the listening position. Most of the time, the automated system will be correct, but there are times that they can be wrong. As such, during configuration, check the distances recorded in the system. If they are wrong, use the controls to correct them to be sure that the sound coming from different speakers will all arrive at the right time.
Manually configuring the balance of speakers for volume simply means pressing a button to tell the system to start sending white noise to each of the speakers. Listen carefully to these sounds or use a sound pressure meter or app, and then adjust the volume for each speaker to make them all the same. The AV system’s manual will recommend a sound level, but 75db is typically the suggested degree.
-
Do a trial run
Once you’ve configured your sound system, play some music or watch several minutes of a movie that you know well. If the audio sounds dull or lacking in some other way, the automated set-up may have suppressed some frequencies.
To fix this, find the equalization or dynamic control. Some models or brands also use a proprietary name such as Audessey or Dolby. Once you find these features, turn them off. You will then notice an improvement in sound quality.
Also Read:- The Do’s and Don’ts in Mobile App Developments
-
Set up the media player
HTiBs that come with a DVD or Blu-Ray player built into the head unit also acts as the AV receiver. They also come with one or two HDMI ports so that you can connect other equipment. However, most of the time, these ports can be quite limited for analog inputs.
Stand-alone AV receivers have the huge benefit of coming with a wide array of inputs and outputs. In addition to the speaker outputs, they come with several HDMI ports and other types of connectors you can use for connecting inputs from your various players, PVR, and even digital antenna. They also have at least one output to the TV. All of these are usually clearly labeled and you should be able to easily understand and follow the instructions on the manual.
Typically, this is simply a case of putting the PVR cable in the PVR port and so on. But there are some systems that will ask you to go into the on-screen menu and choose a name for each port that is displayed on the remote control. This is simply to ensure that when you press the Blu-Ray player button on the remote, you don’t get the PVR, and vice-versa. The good news is that you won’t have to repeat this step after you complete the initial setup.
You can place your CD, DVD, Blu-Ray players, PVRs and other devices anywhere you like but make sure you have cables that are long enough. Use HDMI wherever possible so that you can minimize the unsightly “cable spaghetti” look, which also makes finding the right connection a huge problem if an issue arises.
A home AV system usually requires a huge initial outlay and a lot of hard work during the installation process. But it is a system that will be worth every penny you paid for and all your time and effort, especially if you are a movie buff and you find no greater joy than simply being glued to your TV screen.
If you find the whole AV system shopping and installation process daunting, remember that there are experts that can help you out. They will guide you in choosing the best home theater system that you can easily understand and use which also fits your budget. They will take care of the installation process from start to finish as well.